Dort runs on flying ships, and sooner or later the party will pilot one, fight from one, or flee in one. This chapter gives you a system for that built entirely out of pieces you already have, range bands, the Piloting and Operate skills, the Flying Ship Crew talents, and the ordinary dice. It is deliberately not a physics class. The goal is drama: chases that turn on nerve and altitude, broadsides that matter, and the occasional glorious, terrible ram. When a ruling is unclear, rule for the cinematic outcome and keep the table moving.
How a Ship Acts
A ship is run like a creature that several characters happen to be standing inside. It takes its turn on its pilot's initiative, and it moves on the pilot's Maneuvers, exactly as a mount moves on its rider's. The other crew take their own turns at their own stations:
- Helm (Piloting, or Operate for non-flying craft), moves the ship, dives, climbs, evades, rams.
- Guns (Heavy Ranged, or Operate for crewed mounts), fires the ship's weapons.
- Deck / damage control (Craft, Athletics, Medicine), fights fires, patches the hull, frees a fouled line.
- Command (Leadership): the Ship's Heart and Battle Helm talents live here; rally the crew, coordinate fire.
For an NPC ship, do not track every sailor. Stat it as a single adversary (Elite or Nemesis) using the ship profile below, and make one Piloting roll and one gunnery roll per round. Player ships get the detail; enemy ships get a threat rating.
Ship Profile
Every vessel is described by the same short block:
| Line | What it means |
|---|---|
| Scale (1–5) | Size. Drives ram damage, handling, and how survivable the hull is. A skiff is Scale 1; a leviathan-class warship is Scale 5. |
| Wounds | The vessel's damage track: its hull integrity. At 0 Wounds the ship is crippled: adrift, sinking, or falling. |
| Resistance | Armor. Subtracted from incoming ship-scale damage, exactly like a character's Resistance. |
| Handling | A flat modifier to the ship's Piloting checks: a nimble ship grants the helm ; a sluggish one imposes . |
| Speed | Cruise rating, used in chases. Higher Speed closes or opens a gap faster. |
| Crew | Minimum hands to fly it / full complement. |
| Weapons | Each lists Arc, Range, vertical reach, Damage, Crit, and Qualities (see Weapon Mounts). |
| Qualities | Special traits: Ram, Reinforced, Swift, etc. |
| Scale | Class | Wounds | Resistance | Handling | Speed | Crew | Typical Armament |
|---|---|---|---|---|---|---|---|
| 1 | Skiff / courier | 10 | 1 | 4 | 1–2 | one swivel light weapon | |
| 2 | Cutter / armed trader | 18 | 2 | — | 3 | 3–8 | 1–2 bearing-arc ballistae |
| 3 | Corvette / patrol ship | 30 | 3 | — | 3 | 10–20 | fixed-forward heavy + side arcs |
| 4 | Galleon / warship | 50 | 4 | 2 | 30–60 | multiple broadside arcs, dorsal/ventral | |
| 5 | Dreadnought / leviathan | 80 | 6 | 1 | 80+ | heavy broadsides, fixed ram |
Ground and water vehicles (wagons, barges, river craft, standard sailing ships) use the same profile minus the altitude rules below: they move and fight in the horizontal plane only, with Operate at the helm instead of Piloting.
The Two Range Systems
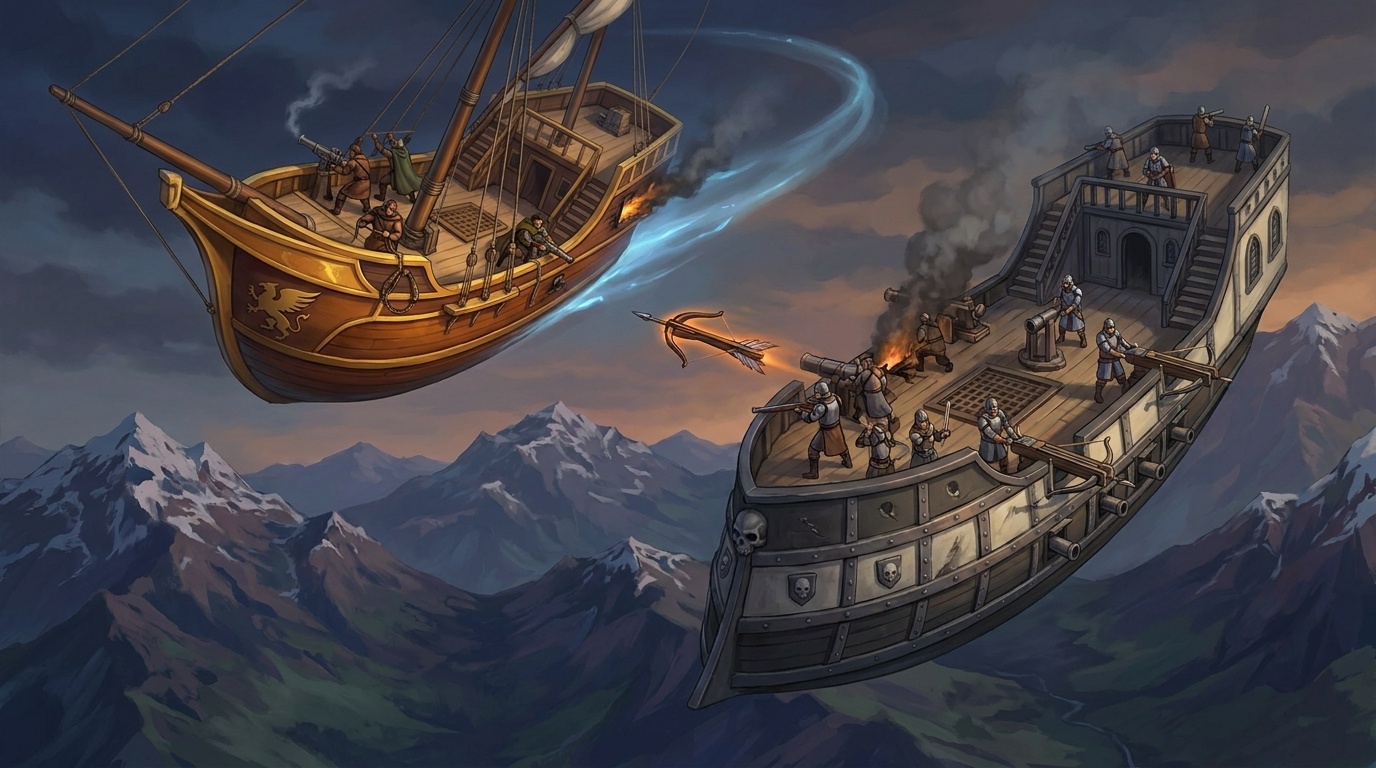
Flying combat tracks position two ways, and you need both.
1. Engagement range, the sphere. The familiar bands, Engaged, Short, Medium, Long, Extreme, measure straight-line distance between two objects regardless of direction. Space is a sphere: a ship a hundred feet above you at otherwise the same spot is at Short range, the same as one a hundred feet beside you. Engagement range is what weapons and movement use.
2. Altitude, height over the ground. Measured in the same band names, but from the ground up: Engaged altitude means touching the ground; then Short, Medium, Long, Extreme as you climb. Altitude is what climbing, diving, falling, and crashing care about.
A flying target's position relative to your ship is therefore two coordinates: a horizontal band and a vertical band. To fire, the target must sit inside your weapon's arc and within its reach on both axes, and a weapon's Range is read at the furthest of the two coordinates. Whichever offset is greater is the one that has to be within range.
Worked example — reading a shot
Your ship mounts a forward fixed ballista, Range Medium, fires straight and level.
- A target at horizontal Medium, vertical Engaged (same altitude as you, a medium hop ahead): same level, within Medium → you can fire. This is the case the fixed forward gun is built for.
- A target at horizontal Short, vertical Medium (close across, but far above you): the fixed gun shoots level and cannot elevate → no shot, even though it is "closer."
- A target at horizontal Long, vertical Engaged: same level, but the furthest coordinate (Long) exceeds the weapon's Medium range → no shot.
Weapon Mounts: Range, Reach, and Arc
Each ship weapon lists three things beyond its damage profile:
- Range — how far it reaches horizontally (in bands).
- Vertical reach — how far it can elevate or depress: level only for a fixed gun, or ±1 band, ±2 bands, etc.
- Arc — the field it can bear on:
Fixed Forward. Fires straight ahead, same vertical level only. It has the longest range of its weapon class and is the cheapest to mount, but you aim it by flying the ship, so a fixed-forward shot is resolved on the pilot's Piloting check, not a separate gunner.
Bearing arc, Fore / Aft / Port / Starboard. Covers one 90° horizontal quadrant. May elevate or depress one vertical band from the ship's level. The workhorse broadside mount.
Dorsal (above) / Ventral (below). Fires into the upper or lower hemisphere and cannot reach the opposite hemisphere: a belly-mounted gun simply cannot hit anything above the ship. To make up for it, these mounts usually have the widest horizontal coverage (often all-around) within their hemisphere.
Turret / Swivel. Pivots to bear in nearly any direction. As part of firing, a swivel mount may shift its bearing by one range category to bring an awkwardly-placed target into a workable band, usually one step (to Short), occasionally to Medium, and only rarely further. A weapon that lists both a range and a direction is a pivoting mount: the direction is what it can swing through, the range is how far it reaches.
Picking a mount, fast
- Want reach and a cheap gun? Fixed forward, but you have to point the whole ship.
- Want flexibility? Bearing arc, 90° and one band of elevation.
- Defending against things below/above? Ventral/Dorsal, wide, but half the sky is blind.
- Want to hit whatever you like? Swivel, short-ranged and expensive, but it pivots.
Movement and Altitude
On the helm's turn, the ship spends Maneuvers like a character, with three rules for the vertical axis.
- Level move: 1 Maneuver per engagement band, as in personal combat (Speed permitting).
- Climb: gaining one altitude band always costs one extra Maneuver, i.e. a climb is the move plus one more. In a normal two-Maneuver turn, that is one band of altitude gained. Ships claw their way up.
- Controlled descent: losing one altitude band costs 1 Maneuver. Going down under control is faster than going up.
Uncontrolled descent (the dive / the fall). Dropping is free: a ship may fall one altitude band at no cost at the start of its turn. You can do this deliberately, a power-dive for speed, or involuntarily, when something shears your lift. But uncontrolled descent is exactly that: while falling, every ship control action adds 1 Trial Die. The ship is fighting you.
You can stay in an uncontrolled descent as long as you like, turn after turn, one free band each time, until you hit the ground. To get out of it, you must take the Regain Control action:
- Regain Control (Action): a Piloting check (difficulty by circumstance and Handling; Hard is a fair default), made with the uncontrolled-descent Trial Die like everything else. On success, the ship levels off at its current altitude band and is no longer in uncontrolled descent. On failure, it keeps falling.
Because regaining control is an Action and a controlled descent is a Maneuver, a confident pilot can do this in sequence: take the free uncontrolled drop, spend the Action to break out of the fall, then spend a Maneuver to begin a controlled descent, dropping fast, then catching it, then easing down. The saving action has to come first. Reach altitude Engaged while still in uncontrolled descent and the ship crashes (see Collisions).
Vehicle and Aerial Chases — The Pursuit Clock
Vehicle chases in Dort, whether flying ships threading canyon corridors or ground convoys on contested roads, resolve through the Pursuit Clock rather than round-by-round range-band tracking. This produces decisive dramatic scenes in a handful of contested rolls, rather than a procedural grind.
The Pursuit Clock is a five-segment track. Segment 1 frames the pursuit; Segments 2–4 are contested exchanges; Segment 5 resolves the outcome.
| Segment | Name | What Happens |
|---|---|---|
| 1 | Contact | The pursuit is established. Both sides know. GM names two or three obstacles. |
| 2 | Scramble | The first contested exchange: both sides fight for Pursuit Lead. |
| 3 | Commitment | Terrain, damage, and decisions narrow the options. |
| 4 | Crisis | One side forces a decisive moment. Both burn what they have left. |
| 5 | Resolution | Escape achieved, capture made, or the situation forces a new scene. |
Speed and starting Pursuit Lead. Before Segment 2, compare the Speed ratings of both sides. The side with the higher Speed begins with 1 Pursuit Lead (or 2 if they outrun the other by 2 or more). If Speed is equal, neither side starts with Pursuit Lead. Handling adds or to every contested Piloting check.
Each contested segment (2–4) resolves as one opposed Piloting check (or Operate for non-flying vehicles; Riding for mount pursuits). Both sides roll. The winner marks 1 Pursuit Lead and shapes the narrative of that segment: they force a harder turn, thread an obstacle, fire a volley that matters, or pull ahead through a city district. Regardless of who wins, the clock advances.
Obstacles. The GM names two or three obstacles at the start. When the clock reaches an obstacle's segment, the pilot who is currently losing may invoke it, forcing the opponent to make an additional check (Hard Piloting or skill appropriate to the obstacle) or suffer a Bane Die on that segment's opposed roll. Examples: a storm front, a canyon run, a crowded harbor, a restricted altitude lane, a rift corridor with navigation hazards.
Burning for advantage. Either side may burn a resource for on one contested roll: a crew talent (Ship's Heart, Hard Turn), a Fortune Point, damage to an important system (overclock the engines), or an environmental gamble (dive into the cloud bank). Name the burn before rolling.
Resolution.
| Pursuit Lead | Result |
|---|---|
| Quarry holds 3+ Pursuit Lead at Segment 5 | Escape: pursuer loses contact. The quarry defines the new scene. |
| Pursuer holds 3+ Pursuit Lead at Segment 5 | Catch: the ships enter Engaged range. Boarding or surrender. |
| Neither side holds 3+ Pursuit Lead | Stalemate: clock resets, but the terrain or damage has changed. Continue with a new Segment 1 or negotiate. |
Ship-to-ship fire during a chase. Any side may fire during Segment 3 or 4 instead of making the full pursuit roll. Make one attack as normal; a hit reduces the target's Speed by 1 for the remaining segments (minimum 1) and adds 1 Bane Die to their next opposed roll. Choosing to fire sacrifices the contested roll entirely; the firing side cannot mark Pursuit Lead that segment.
Ship Combat Resolution
- Check the arc and reach. Is the target inside the weapon's arc, and within range at the furthest of its horizontal and vertical offsets? If not, no shot, reposition.
- Roll the gunner's attack. Heavy Ranged (or Operate) for crewed guns; Piloting for fixed-forward. Difficulty by engagement band, same as personal ranged fire: Short = Easy, Medium = Average, Long = Hard, Extreme = Severe; Engaged (boarding range) = Average + .
- Damage. Weapon Damage − target ship's Resistance = Wounds lost, minimum 0; each extra Success adds +1. Boons, Banes, Breakthroughs, and Calamities resolve exactly as in personal combat.
- Critical Hit. A Breakthrough, or net Boons spent at the weapon's Crit rating, scores a Ship Critical Hit instead of a personal Critical Injury, roll on the table below. (A ram, a collision, or a hard crash also inflicts one.)
- Crippled at 0 Wounds. The ship is out of the fight: adrift, afire, sinking, or in uncontrolled descent toward the ground. Narrate which.
Ship Critical Hits
This is the vessel's version of the personal Critical Injury table (Chapter Nine). The roll works the same way, d100 plus 10 for every unrepaired critical, and the result persists until someone clears it, but the ship table has its own fifteen entries in 10-point bands rather than the injury table's twenty-five graded entries. Where a character takes a lasting wound, a ship takes a lasting system failure, fouled rigging, a smashed helm, a fire below decks, that persists until a crew member repairs it with a damage-control Action (Craft, or Athletics to fight a fire). It also escalates the same way, so a battered ship gets easier to cripple as the damage compounds.
Triggering it. A Ship Critical Hit lands when an attack spends a Breakthrough, when net Boons at or above the weapon's Crit rating are spent to inflict one, or from a ram or crash. Roll d100 and add +10 for every Ship Critical Hit the vessel already carries. Read the result below.
Reading the ship table
A fresh ship can roll no higher than 100: a single hit never destroys a vessel outright. Destroyed sits at the very top, reachable only after the +10-per-hit climb stacks several unrepaired criticals together: it takes five or more to put a roll in the killing range, not two or three lucky shots. On a flying ship read "uncontrolled descent" literally; on a ground or water craft, read it as careening, losing steering, or taking on water.
| d100 (+10 per existing Critical Hit) | System Failure | Effect |
|---|---|---|
| 01–10 | Jolted | Everyone aboard adds to their next check as the hull rings. Clears on its own next round. |
| 11–20 | Knocked Off Course | The attacker shoves the ship one engagement band in a direction of their choice; the helm adds to its next Piloting check. |
| 21–30 | Rigging Snarled | Reduce the ship's Speed by 1 (minimum 1) until cleared (Average Craft). |
| 31–40 | Helm Fouled | Add to all Piloting checks until repaired (Average Craft). |
| 41–50 | Gun Crew Scattered | One weapon cannot fire next round, or a Minion crew group takes a hit (GM's choice). |
| 51–60 | Hull Breach | The ship loses 2 Wounds at the start of each round until patched (Average Craft). |
| 61–70 | Weapon Wrecked | One mounted weapon is knocked out until properly repaired (Hard Craft + materials). |
| 71–80 | Lift Torn / Rigging Cut | The ship immediately enters uncontrolled descent; recover with a Regain Control Action as normal. |
| 81–90 | Fire! | The ship loses 4 Wounds at the start of each round, +1 more for every round it goes unfought; a damage-control Action (Average Athletics or Craft) puts it out. |
| 91–100 | Helm Smashed | The ship cannot change course or altitude under control until repaired (Hard Craft); it holds its heading, or continues an uncontrolled descent already underway. |
| 101–110 | Core / Engine Hit | Speed drops to 1 and the ship adds to all Piloting checks until field-repaired (Hard Craft). |
| 111–120 | Structure Buckling | Reduce the ship's Resistance by 2 and add to all checks aboard until the vessel reaches a proper dock. |
| 121–130 | Going Down | The ship is crippled: the 0-Wounds state begins (adrift, sinking, or in uncontrolled descent). The crew can still act, but only a heroic damage-control sequence saves the vessel. |
| 131–140 | Catastrophic Failure | As Going Down, and every creature aboard suffers a personal Critical Injury (debris and blast); roll on the Chapter Nine table for each. |
| 141–150 | Destroyed | The ship breaks apart, burns out, or plunges. Surviving it (lifeboats, abandon ship, the long fall) is its own scene. |
A ground or water vehicle reads "uncontrolled descent" as a careen or loss of steering, and "Destroyed" as wrecked, capsized, or sunk.
Boarding
When two ships are at Engaged engagement range, crews can board. Crossing is a Maneuver (an Athletics or Reflexes check if it is contested or the footing is bad); from there it is ordinary personal combat on a moving, pitching deck while both pilots keep maneuvering underneath the fight. A boarded ship whose helm is busy fighting cannot also evade, choosing whether to fly or to repel boarders is the drama.
Ramming
Ramming is an Action taken while Engaged with a target ship. It hurts both vessels, that is the point, but a ship built for it hurts far less.
Improvised ram (any ship). Make an opposed Piloting check against the target's evasive Piloting. On a hit, the target takes Ram Damage (below), and the rammer takes self-damage equal to half of that same Ram Damage, rounded up. Ordinary hulls were not made for this; a merchant captain who rams is gambling their own ship.
Dedicated ram (ships with the Ram quality). A reinforced prow. These ships have a Ramming Attack action that replaces their normal gunnery action while Engaged. It deals +2 Ram Damage, and the rammer takes self-damage equal to only a quarter of that same Ram Damage, rounded up, because the structure is designed to deliver and absorb the blow. When a ship has the Ram quality, this action overrides the improvised rule above.
Ram Damage by attacker Scale (before the target's Resistance):
| Attacker Scale | 1 | 2 | 3 | 4 | 5 |
|---|---|---|---|---|---|
| Base Ram Damage | 6 | 8 | 10 | 12 | 14 |
Then apply:
- Size difference. For each Scale the attacker is larger than the target: +2 Ram Damage, and the attacker takes 2 less self-damage before its own Resistance. For each Scale the attacker is smaller: the attacker takes +2 self-damage before its own Resistance. (A skiff ramming a galleon mostly destroys the skiff.)
- Momentum. If the attacker closed at least one engagement band this turn before impact, built up speed, often out of a dive, +2 Ram Damage.
Aftermath. On a Calamity from either side, or a failed control check in the next round, a ship is flung into uncontrolled descent or left adrift; tangled wrecks may end up grappled at Engaged, which is an invitation to board. Resolve the collision for maximum cinema and minimum arithmetic: the ramming ship's fate should feel as much in doubt as its target's.
Ship Weapons
Ship-scale weapons reconcile with the shipboard arms in the Player's Guide (Chapter Eight): the Ballista and Catapult are the same weapons here. Each lists its mount Arc per the rules above; range is read at the furthest of a target's horizontal and vertical offsets.
| Weapon | Dmg | Crit | Range | Qualities | Typical mount |
|---|---|---|---|---|---|
| Swivel gun (light ballista) | 7 | 3 | Medium | — | Swivel; small craft |
| Ballista | 10 | 2 | Long | Pierce 3, Blast 2, Slow-Firing 2 | Fixed or bearing arc |
| Heavy bolt-thrower | 12 | 2 | Long | Pierce 4, Slow-Firing 2 | Fixed forward; armor-breaker |
| Catapult | 12 | 2 | Extreme | Blast 4, Inaccurate 1, Slow-Firing 3 | Fixed or bearing arc; siege |
| Arcane lance | 11 | 3 | Long | Slow-Firing 1, Pierce 2 | Fixed; a crew caster spends 2 Strain to fire |
A weapon's vertical reach follows its arc (fixed = level only; bearing = ±1 band; dorsal/ventral = one hemisphere; swivel pivots). Crews fire with Heavy Ranged (Operate for a swivel), and fixed-forward guns are aimed by the pilot's Piloting.
Sample Ships
Courier Skiff, Scale 1. Wounds 10, Resistance 1, Handling , Speed 4, Crew 1–2. Weapons: Swivel gun (Swivel, Range Medium; Dmg 7, Crit 3). A darting message-runner and scout. Fast, fragile, and almost impossible to corner, but one solid broadside ends it.
Trade Cutter, Scale 2. Wounds 18, Resistance 2, Handling —, Speed 3, Crew 3–8. Weapons: Two bearing-arc ballistae (Port and Starboard, Range Long, ±1 band; Dmg 10, Crit 2, Pierce 3, Blast 2, Slow-Firing 2). The workhorse armed merchant. It would rather run than fight, and it can throw a respectable broadside if it has to.
Accord Patrol Corvette, Scale 3, Ram (reinforced prow). Wounds 30, Resistance 3, Handling —, Speed 3, Crew 10–20. Weapons: Fixed-forward heavy bolt-thrower (Fixed Forward, Range Long, level; Dmg 12, Crit 2, Pierce 4, Slow-Firing 2); Port & Starboard ballistae (bearing arc, Range Long, ±1 band; Dmg 10, Crit 2, Pierce 3, Blast 2, Slow-Firing 2). A law-keeper's interceptor. It lines up the fixed heavy gun by flying straight at you, and if you close the distance, the reinforced prow is more than happy to use the Ramming Attack.
Mounts
A mount uses its own profile when it is attacked, frightened, pushed past its limits, or asked for a difficult physical feat. The rider uses Riding for mounted travel and hard maneuvers under pressure, and Survival to calm, read, care for, or handle an animal outside fast-moving action; Leadership can steady a trained beast. Ordinary riding animals are not battle-trained: they add Bane Dice to Riding checks made to control them during combat, a monster attack, fire, or a source with a Fear rating of 3 or higher. Mounts do not make their own Fear check; the rider makes a Riding check at a difficulty equal to the Fear rating (Player Guide, Chapter Thirteen, Fear). Warhorses ignore this under ordinary battlefield conditions.
Most mounts are Elites when tracked individually; a string of identical pack animals can be run as a group.
Full mount profiles, characteristics, skills, abilities, attacks, and trade values, live in the Ix Adversary Catalog, Chapter Thirty (Beasts & Animals), filed alphabetically with the rest of the fauna. Pull the entry when a mount is attacked, panics, or has to do something hard. The table below carries the two numbers a chase or a stray arrow actually needs, so you can run the moment without opening the catalog.
| Mount | Wounds | Resistance | Role |
|---|---|---|---|
| Donkey | 8 | 1 | Pack |
| Pony | 9 | 1 | Riding |
| Mule | 10 | 2 | Pack, riding at need |
| Riding Horse | 11 | 2 | Riding |
| Camel | 11 | 2 | Riding, pack (arid country) |
| Ox | 13 | 2 | Draft |
| Light Warhorse | 13 | 3 | War |
| Heavy Warhorse | 15 | 4 | War |
| Draft Horse | 20 | 4 | Draft |
| Orcish War Brute | 20 | 6 | War |
Draft Horse and Orcish War Brute use the Adversary Catalog's numbers, which are higher than the figures this chapter carried in earlier drafts. War Brutes are not sold in conventional markets: acquiring one outside orcish territory takes a real relationship with a Greyfang warband, a rare private arrangement, or theft.
Mundane Vehicle Profiles
Ground and water vehicles use the same core stat block as everything else, Resistance and a single Wounds track, plus the vehicle descriptors. They are driven with Operate (Riding for an animal team that has to be controlled under pressure), and they plug straight into the chase, collision, and Critical Hit rules above; they simply have no altitude.
In the tables, Handling is the modifier to maneuver checks: a positive number is that many Boon Dice, a negative number that many Bane Dice. Cargo is a relative capacity rating, not a precise weight. Animal-drawn vehicles can never move faster than their team.
Land vehicles
| Vehicle | Scale | Speed | Handling | Resistance | Wounds | Crew | Pass. | Cargo |
|---|---|---|---|---|---|---|---|---|
| Wheelbarrow | 1 | 1 | +1 | 0 | 1 | 1 | 0 | 10 |
| Handcart | 1 | 1 | 0 | 0 | 2 | 1 | 0 | 25 |
| Cart | 2 | 1 | 0 | 0 | 3 | 1 | 1 | 60 |
| Wagon | 2 | 1 | −1 | 0 | 5 | 1 | 4 | 120 |
| Covered Wagon | 2 | 1 | −1 | 0 | 5 | 1 | 4 | 100 |
| Heavy Freight Wagon | 3 | 1 | −2 | 0 | 7 | 1–2 | 2 | 250 |
| Carriage | 2 | 2 | 0 | 0 | 3 | 1 | 4 | 20 |
| Coach | 2 | 2 | −1 | 0 | 4 | 1–2 | 8 | 35 |
| Sled | 2 | 1 | 0 / −2 | 0 | 4 | 1 | 2 | 100 |
Cart: one draft animal. Wagon: two. Heavy Freight Wagon: four; hard to handle on narrow roads. Covered Wagon: shelter and limited weather protection. Coach: four horses when speed matters. Sled: Handling 0 on snow or ice, −2 elsewhere.
Water vehicles
| Vehicle | Scale | Speed | Handling | Resistance | Wounds | Crew | Pass. | Cargo |
|---|---|---|---|---|---|---|---|---|
| Canoe | 1 | 1 | +1 | 0 | 2 | 1–2 | 2 | 10 |
| Rowboat | 2 | 1 | 0 | 0 | 3 | 1–4 | 4 | 20 |
| Fishing Boat | 2 | 2 | 0 | 0 | 6 | 2–4 | 4 | 75 |
| River Barge | 3 | 1 | −3 | 0 | 10 | 4–8 | 10 | 400 |
| Small Sailing Vessel | 3 | 3 | −1 | 0 | 10 | 5–10 | 10 | 200 |
| Merchant Ship | 4 | 3 | −2 | 1 | 18 | 15–30 | 20 | 1,000 |
| Large Merchant Ship | 4 | 2 | −3 | 1 | 24 | 30–60 | 40 | 2,000 |
River Barge: superb cargo hauler, but tied to suitable waterways. These are civilian craft: the armed warships in the Scale table earlier carry far more Wounds and Resistance at the same size.
Vehicle Damage and Repairs
A vehicle's Wounds behave like any other damage track, Resistance soaking each hit first. Reduce a vehicle to 0 Wounds and it is wrecked: a wagon shatters, a boat is swamped, a barge breaks up.
Mechanical failures short of destruction, a snapped axle, a thrown wheel, torn rigging, a lost mast, are Critical Hits, read off the Ship Critical Hit table earlier in this chapter (on the ground or water, take "uncontrolled descent" as a careen or a loss of steering). A Breakthrough, net Boons at the weapon's Crit rating, a hard collision, or pushing a vehicle past its limits can all trigger one.
Interpret the result through the fiction: a disabled wagon does not explode; a holed ship takes on water, loses a mast, or drifts. Routine upkeep is part of normal travel costs; real damage takes time, tools, replacement parts, and an appropriate Craft check. And remember mud, slopes, weather, overloading, or a damaged wheel can cut a vehicle's effective speed well below the numbers above.
Boarding Actions — Crew Casualties
When ships reach Engaged range during a chase or combat and boarding begins, crew members who are not player characters fight as Minion groups (see Chapter Nine, Adversary Tiers). Organize them into groups of three to five and treat each group as a single combatant using the Guard or Mercenary hireling profile in GM Guide Chapter Eight, Hirelings, Followers, and Retainers.
When a Minion crew group is reduced to 0 Wounds, call for a Dedication check from the remaining crew: Willpower, difficulty set by how the battle is going (Easy if winning, Average if even, Hard if losing). On failure, surviving crew surrender, withdraw, or scatter. On success, they hold. The pilot and any named NPCs with Elite profiles continue to act independently.